
Broccoli, carrots, sweet potato, avocados, bananas, pears, zucchini, apples, parsnip, rutabaga, leek, potatoes, pomegranate, mango
What an adventure this has been trying to figure out the whole weaning process! For all of you that have gone through it, you know what I mean and for those of you who haven’t yet, it is quite the process and your little one is the one and only that can let you know that he or she is ready to move on. And boy do they have interesting ways of doing that!
Just as I began feeling comfortable with making my “root vegetable” purees, simple apple and pear purees for her morning baby oatmeal, prune and dried fruit purees for her occasional constipation, my weekly trips to Whole Foods for organic vegetables and fruits had to be shaken up a bit!
Around 8 months, she let me know she was ready for something new as she quit eating her purees! I read that refusing foods she would typically eat, could mean any number of things: teething, a cold coming on, a new found independence and a desire to not sit in her high chair because she is so mobile now, or her way of letting me know she was ready to move on to solid foods – like finger foods. So I tried it – and sure enough, she was ready for something DIFFERENT.
And I tried just about everything – I pretty much racked my brain and let her try just about anything – minus the salt and sugar. (It’s a personal decision – I won’t let her have any cake, cookies, doughnuts, ice cream, icing – basically, no sugar anything! She has her whole life to add those to her diet as she wants but for now, I would prefer to keep her palate free of the sweet which is a preferred flavor overall others).
I knew I needed to get a new routine and I had to think about this – so I began with the main focus it all – What was I trying to accomplish with her weaning process? I want to get her 1. to eat what we eat, 2. To broaden her palate, 3. To increase her food repertoire and 4. To give her the most healthy start to life possible. (Isn’t that what we as parents all want?)
The first new foods that seemed like no-brainers were eggs and cheese, mashed potatoes, mashed sweet potatoes, mangoes, organic Greek yogurt, silken tofu and pastas. I knew it was important that she begin getting protein at least three times a day, whole wheat grains at least three times a day, veggies four times a day and fruit a couple times a day. And she really needs iron right now – they are born with an iron store from mommy that lasts until 6 months of age. Then, babies tested are always lacking in iron which is essential to brain development until the age of two. Until the age of two, our babies are growing and developing at an amazing rate and all of their cognitive development is occurring – we are feeding their brains – LITERALLY. Between what they eat and their sleep, (plus a lot of loves, hugs and kisses), there isn’t anything better we can be doing for them at that moment. Fueling their little bodies with the proper, home made, balanced meals means they are receiving the vitamins and minerals necessary for healthy development minus the harmful GMOs and GMIs and preservatives.
I noticed she was eating and seeming to REALLY enjoy the organic baby food pouches I buy for her on occasions for when we are going to be out at restaurants or traveling. These purees are full of preservatives and everyone of them taste the same and all of them are SWEET. And the store bought food pouches that contain meat, do NOT taste like meat! I actually tried to eat a full serving and my tongue felt weird – like it had fur on it half way through. When I tasted it, I was reminded of the way my dog’s food smells – no kidding. She did not like them at all and I could see why.
She is at the point that she still wants purees – just more sophisticated purees. She was basically bored with my simple peas and carrots, butternut squash and pears, apples and sweet potatoes, pumpkin and parsnips. She wanted more flavor and something different with minimal textures. And it is so important to introduce baby to new textures all the time so they get used to it. Otherwise, they learn that everything should be smooth. And that will be another food obstacle when you’re ready for them to begin eating what you eat at the table with family and friends.
The introduction of very soft foods was wonderful and eye opening. She was still moving slowly and would occasionally gag because she only has four teeth and was pretty much gumming everything. So I was learning as I was going what to give her. She loves cheese – specifically Munster and cheddar cheeses. She would gobble up scrambled eggs with cheddar cheese, organic Greek yogurt with organic mixed frozen berries, cottage cheese. This made our weekly Saturday morning breakfast out at our favorite diner with daddy a whole new, awesome experience. I could order scrambled eggs with cheddar cheese, whole wheat toast, oatmeal, avocado and cottage cheese and she would happily sit tasting everything at 8-9 months old while patrons close-by would look on admiring our “adventurous, little eater” and commenting that they couldn’t believe how well-behaved she is.
After a couple of weeks fretting over what to do and getting overwhelmed searching for the right foods, I realized that I needed to create well-balanced meals that I could puree or leave very soft with tiny chunks and would taste really good so that it was appetizing. I was also focused on broadening her horizons while encouraging her to not be a picky eater. I wanted to make a few recipes in the beginning so that I could get used to making them and it wouldn’t be a time consuming, full gourmet meal each time I needed to prepare her food.
I found a few recipes in the book I mentioned in my part one of this post, “Top 100 Baby Purees,” by Annabel Karmel. Another one I created and another one I found online.
I was fascinated with the idea I could make her her first Spaghetti Bolognese. This particular recipe I made is from this book and I put my own spin on it. I also added my comments as to why I used particular ingredients.

Ingredients for the Baby’s First Spaghetti – I used whole wheat orzo instead of spaghetti noodles.
The ingredients are as follows and makes 3 LARGE portions (I doubled the recipe the second time I made it because it freezes well and let’s face it, if you’re going to make the mess – might as well make it worth the effort!) It made 6 – 4oz portions and she usually eats less than that because it has meat and pasta so it’s heartier than her usual vegetable portions.
1 1/2 T vegetable oil
1 clove garlic, crushed
1/2 C chopped onion
1 medium carrot peeled and grated
1/4 C wiped and sliced button mushrooms
5 oz organic, *grass-fed, lean ground beef
1/2 C organic canned crushed tomatoes
1 C organic chicken stock
a few drops of worcestershire sauce
Pinch of brown sugar
1 bay leaf
2 oz orzo
Heat 1T of veg oil in a saucepan and sauté the garlic and onion for 2 minutes. Add the grated carrot and sauté for 2 minutes longer. Pour in the remaining oil and sauté the mushrooms for about 3 minutes.

Sautee the onion and garlic until tender or opaque in color then add carrots and sautee until tender.

Using organic mushrooms automatically introduces baby to another new food that is good for them! Remember to WIPE them off, do not rinse. Mushrooms are spongy and will retain the water.
Meanwhile, saute the ground beef in a separate pan. Once browned, add to the vegetables together with the tomatoes, stock worcestershire sauce, sugar and bay leaf. Cover the pan and simmer for about 15 minutes; remove bay leaf. Cook orzo according to package about 7 minutes – minus the salt

Cook the meat in a separate pan and then combine with the garlic, onion, carrots and mushrooms.
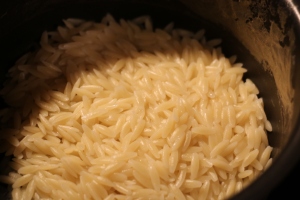
Cook Orzo without using salt about 7 minutes.
Puree the cooked meat and vegetable mixture using a handheld electric blender for a smoother texture for baby – at 9 months this is still what I prefer to her when meat is concerned. Otherwise, she moves the small pieces of meat around in her mouth with her tongue (it’s difficult for them to move small pieces to the back of their throats with their tongues) and they actually gag her. I have gone back to her 5 minutes after eating and she will STILL have chicken or ground beef in her mouth – not what you want to see! Add a small tablespoon or less of orzo to a serving of the mixture and bon appetite!

Use a handheld electric blender to mix to desired consistency.

Ready to eat.

Mattelyn at 9 months tasting the new spaghetti for the first time.
*I use grass-fed organic ground beef when preparing food for her. There are several reasons and if you buy in bulk (3lbs or more) the butcher usually gives you a great discount and it makes it worth the purchase. The meat is higher in iron because the cow only grazed on grass – this makes it better for baby AND for mommy that is breast feeding or is pregnant because we all lack iron as well. The meat is more tender and the animals aren’t fed oats or soybeans that have growth hormones in them. This has been something I have tried to safeguard her against from the beginning. If possible, I am trying to limit her exposure to GMOs or GMIs. This is just a personal preference and I want to let you know why I decided to purchase this type of meat.
I will post more recipes as I have time – I must run because daddy is running out of things while he watches her. I am trying to get a lot better about posting – shooting for once a day – but we will see! I must do shorter posts and then I will be more successful!
XO ~ Stephanie

 This may sound cliche, but I find great joy in making fresh, organic, homemade baby food for my babies! It is SUCH A SMALL AMOUNT OF TIME that they actually eat baby food. They can’t eat solids until 6 months, and they are often ready to move on by 8 months. And yet, during this small timeframe SO MANY GOOD EATING HABITS ARE ESTABLISHED. They learn to “chew” and swallow properly which also assists in their muscles that aid in speech. It’s hard to believe it’s really only two months we need to provide our children with such important “firsts” but it truly makes a difference down the road. Especially when introducing as many new flavors and textures as possible. I don’t like the flavor of baby food you can purchase on the shelf in the store – the preservatives make it storable for up to two years. And it DOES NOT TASTE LIKE BABY FOOD (in my opinion). The preservatives often make everything taste sweeter than normal and create a false expectation that all foods are sweet and they don’t learn an early appreciation for savory flavors which make up the majority of what we eat as adults. Baby food should taste just like what we eat but with less spice, perhaps. Our main objective when training our babies to eat is to eventually get them eating what we eat. If their first foods don’t taste like our food, and if they don’t get introduced to new flavors early on, they won’t be apt to trying different flavors and textures when they are toddlers. Which makes for picky eaters.
 My 7 month old twins LOVE this “root trio” veggie puree so I wanted to be sure to pass it along. My daughter loved this too. It’s so important at this stage in their weaning to solid foods to introduce AS MANY new flavors and textures as possible! The more they try at this age, the more open to new flavors they will be when they’re toddlers. Plus, the more likely they will be to establish good eating habits early on. (If you are interested in reading more about stage one weaning and why I believe so much in this, check out my post on my first go around making my daughter’s organic homemade baby food – I read SO MUCH the first time around and I learned a ton that I try to pass along to you, “Homemade Organic Baby Food – My Journey,” and “Part Two: My Journey Making Homemade Organic Baby Food.”)The root trio veggie puree’ is simply carrots, sweet potato and parsnips steamed and then pureed in a blender with the water used while steaming. Root veggies are naturally sweet and puree easily to a smooth consistency. Add a little of baby’s regular milk to make it the consistency they like. Introducing your baby to a new flavor like parsnips or rutabaga might not appear to be your first choice but doing this early on really does open doors to what they will try later on in the toddler years. Sweet potatoes are a good source of vitamin C and beta-carotene and are richer in nutrients than regular potatoes. One more to note – organic carrots, rutabaga and parsnips are best to use for baby (and yourself) as they are more susceptible to absorbing chemicals in soil than other vegetables. And, the darker the organic carrot, the more mature and more full of flavor and vitamin A and beta-carotene. Parsnips are a root veggie that is a relative of the carrot family. They are often sweeter when cooked than the carrot and make it a perfect pairing for the sweet potato and carrot and a delicious first food puree for baby.


